Create and Send an Invoice
Attach jobs or add manual line items, set payment terms, tax, and a customer memo, then finalize and send the invoice.
You need a customer on file, billed by invoice rather than card, to invoice against. If the work is already scheduled as a job, invoicing it goes faster — but nothing here requires a job to exist first.
1Start the invoice
-
From the Invoices page, click New Invoice. You can also start one from a customer's page — open their dropdown and choose New Invoice.
-
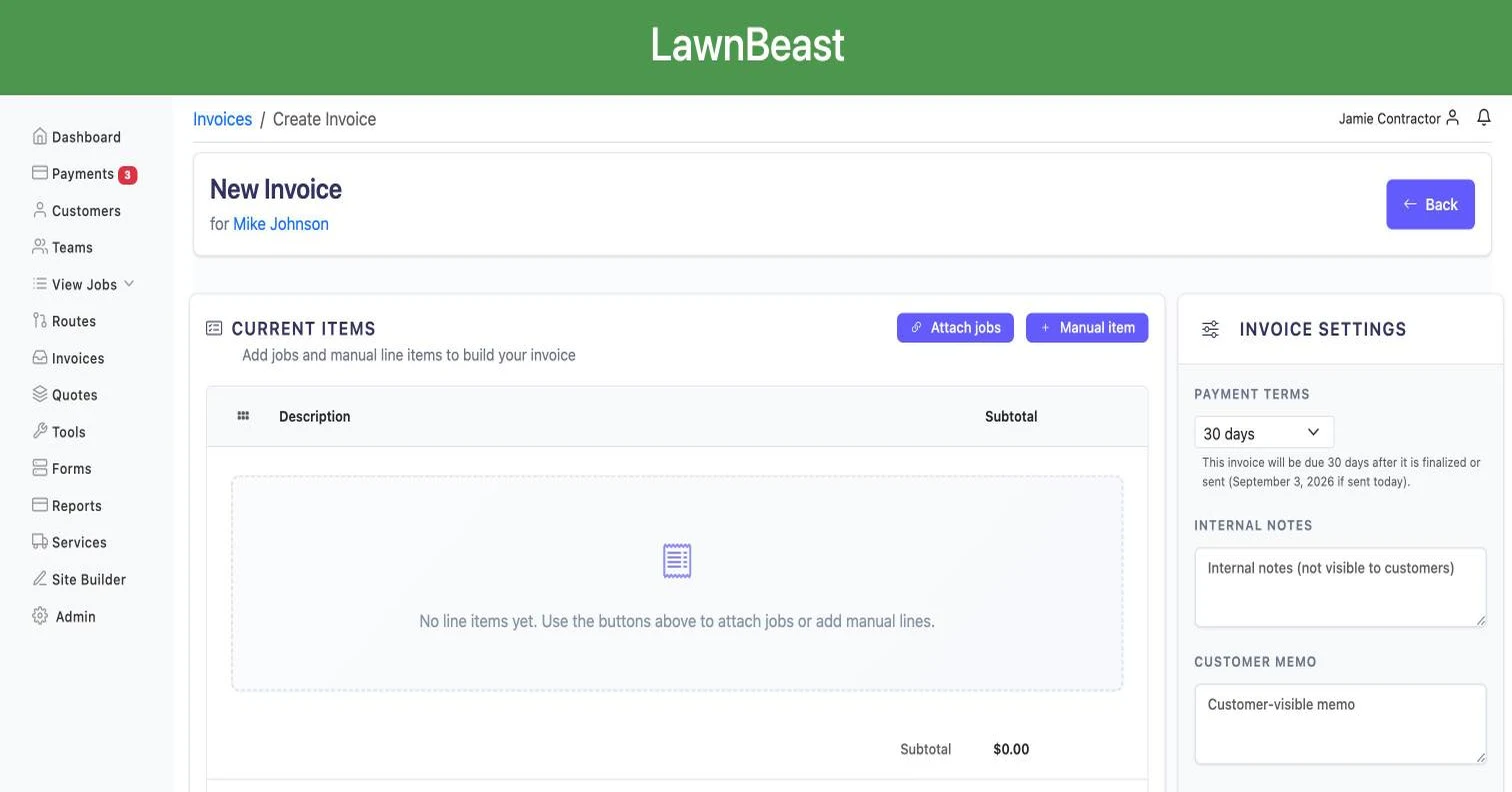
Pick the customer you're billing. This opens the invoice editor for a new draft.
How to check it worked
You land on the invoice editor with an empty Current Items list and the customer's name under the page title.
2Attach jobs or add manual items
Do either, or both — a single invoice can mix attached jobs with manual line items.
-
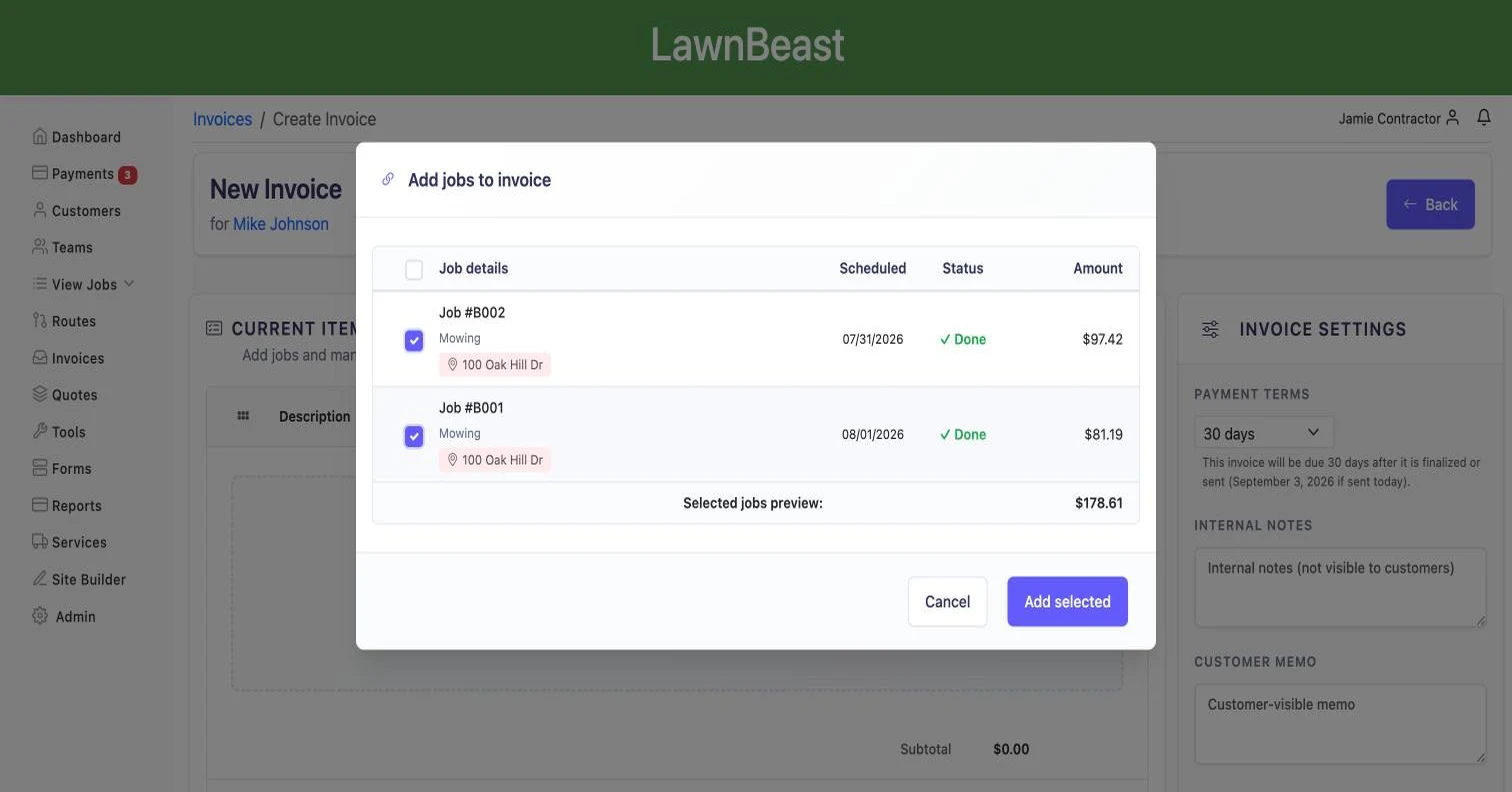
Click Attach jobs to open Add jobs to invoice. Only jobs billed by invoice, not cancelled, and not already on another invoice show up here. Check the ones you want — the modal totals your selection as you go — then click Add selected.
- If a job you expected isn't listed, it's excluded for one of those three reasons — the modal shows the same criteria when the list is empty.
- Not sure whether something belongs on a job or an invoice in the first place? See Jobs vs. Invoices.
-
Click Manual item for anything without a job behind it. Fill in the description, Qty, and Price, and check Taxable if it should carry sales tax. On a customer with more than one property, a property picker also appears so you can tag which address the charge is for.
-
Drag the grip icon on the left of any row to reorder line items.
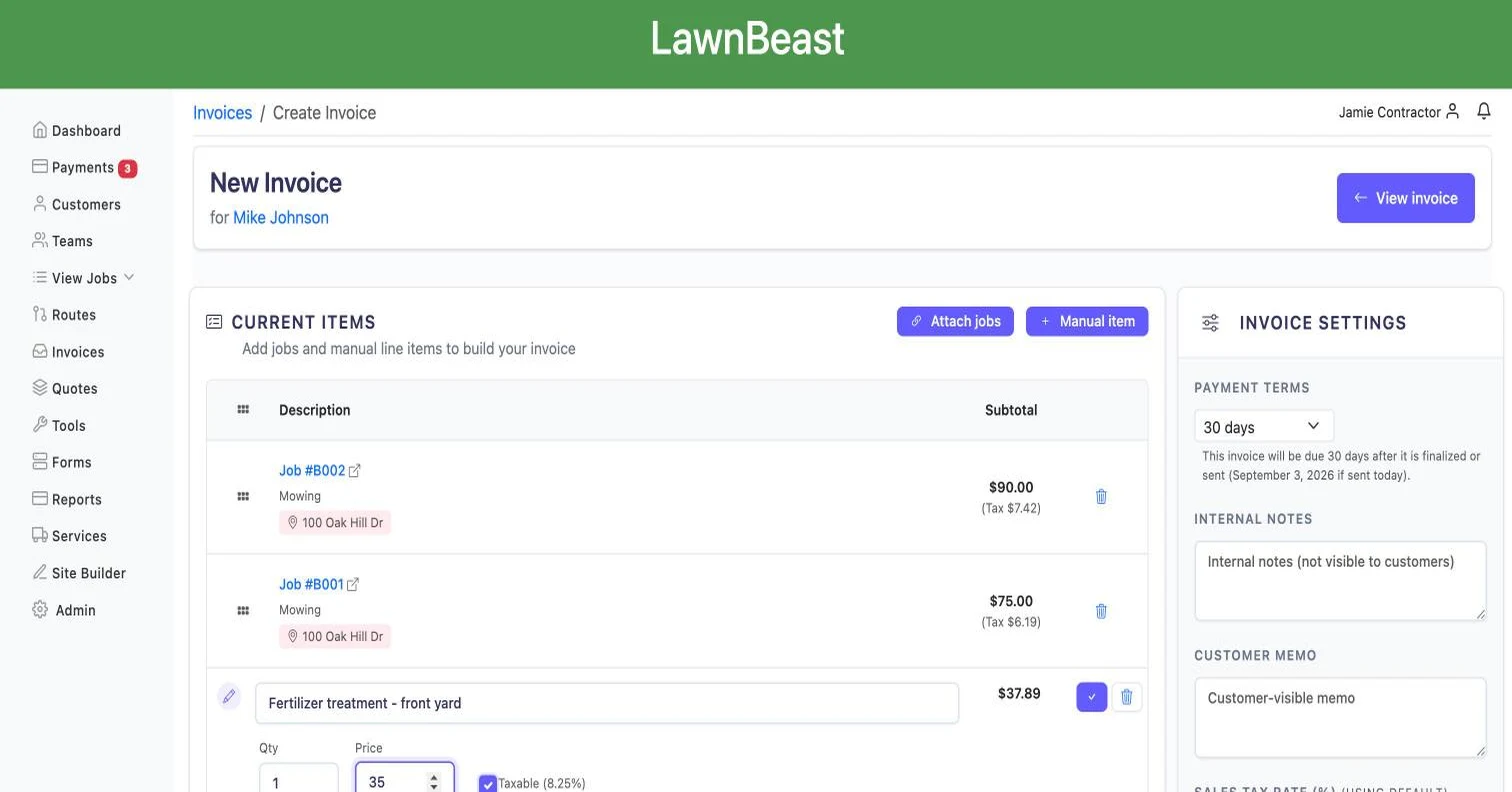
Every change — attaching a job, adding a manual item, reordering rows — saves automatically. Watch the header for "Saving…" then "Saved".
How to check it worked
The Current Items table lists what you attached or added, and the Subtotal, Tax and Total rows below it update to match.
3Set terms, tax, and notes
All of this lives in the Invoice Settings sidebar, on the right.
-
Choose Payment terms — Today, Tomorrow, 7/14/30/60/90 days, or Custom for a specific Due date.
-
Leave Sales tax rate (%) blank to use your account default, or type a different rate for this invoice only.
-
Write Internal notes for your own team — these never leave LawnBeast — and a Customer memo for anything you want printed on the invoice the customer sees. They're separate fields; nothing you type in one appears in the other.
-
Set Tips if this invoice needs to differ from your account default: force them on, force them off, or leave it on Use account default to follow whatever your Tip Settings page has configured.
How to check it worked
The tax line above the total updates to the rate you set, and the sidebar labels reflect whichever choice is active (e.g. "(Using default)" next to Sales tax rate).
4Finalize and send
The builder only edits draft invoices. Finalizing and sending happen on the invoice's own page, one click away. Doing this by hand for every job? If the same customer bills the same way on a schedule, Automatic Invoicing can generate and send these without you opening the builder at all.
-
Click the button in the top right to leave the editor and land on the invoice's detail page. It reads Back for a brand-new draft, and relabels itself View invoice once the first autosave has created the invoice.
-
Click Finalize. This opens Change Invoice Status with Finalize invoice ("Mark as open and send to customer") already selected — confirm with Update Status. This moves the invoice from draft to open, and the app warns you the step can't be undone.
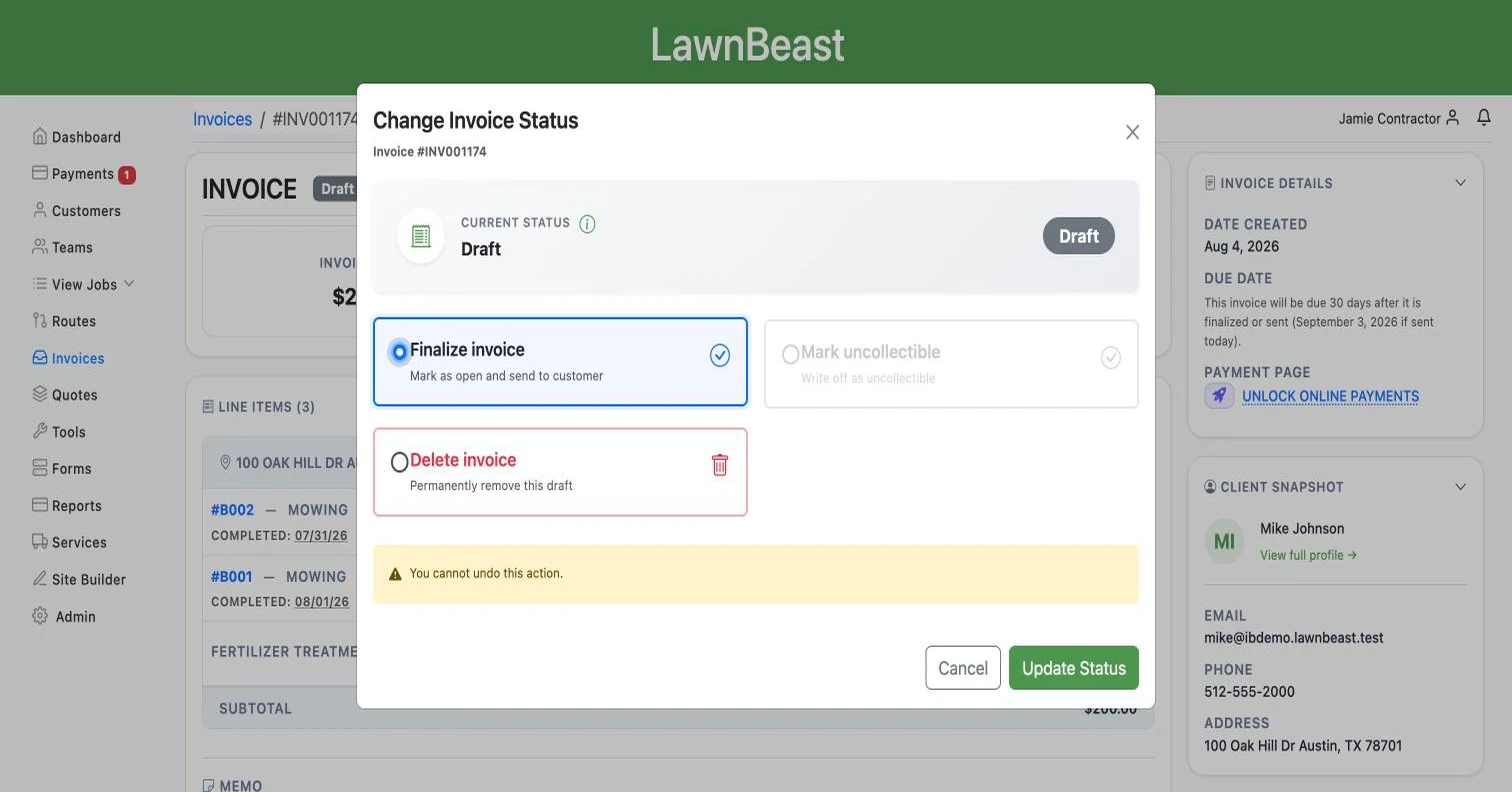
Confirming the draft-to-open move, which the app flags as permanent. -
Once the invoice is Open, click Send Invoice, confirm or edit the recipient email, and send. The same button reads Resend Invoice if you've already sent it once, or Send Receipt once the invoice is paid. What the customer actually receives — your logo, license lines, and layout — comes from your Invoice Branding settings.
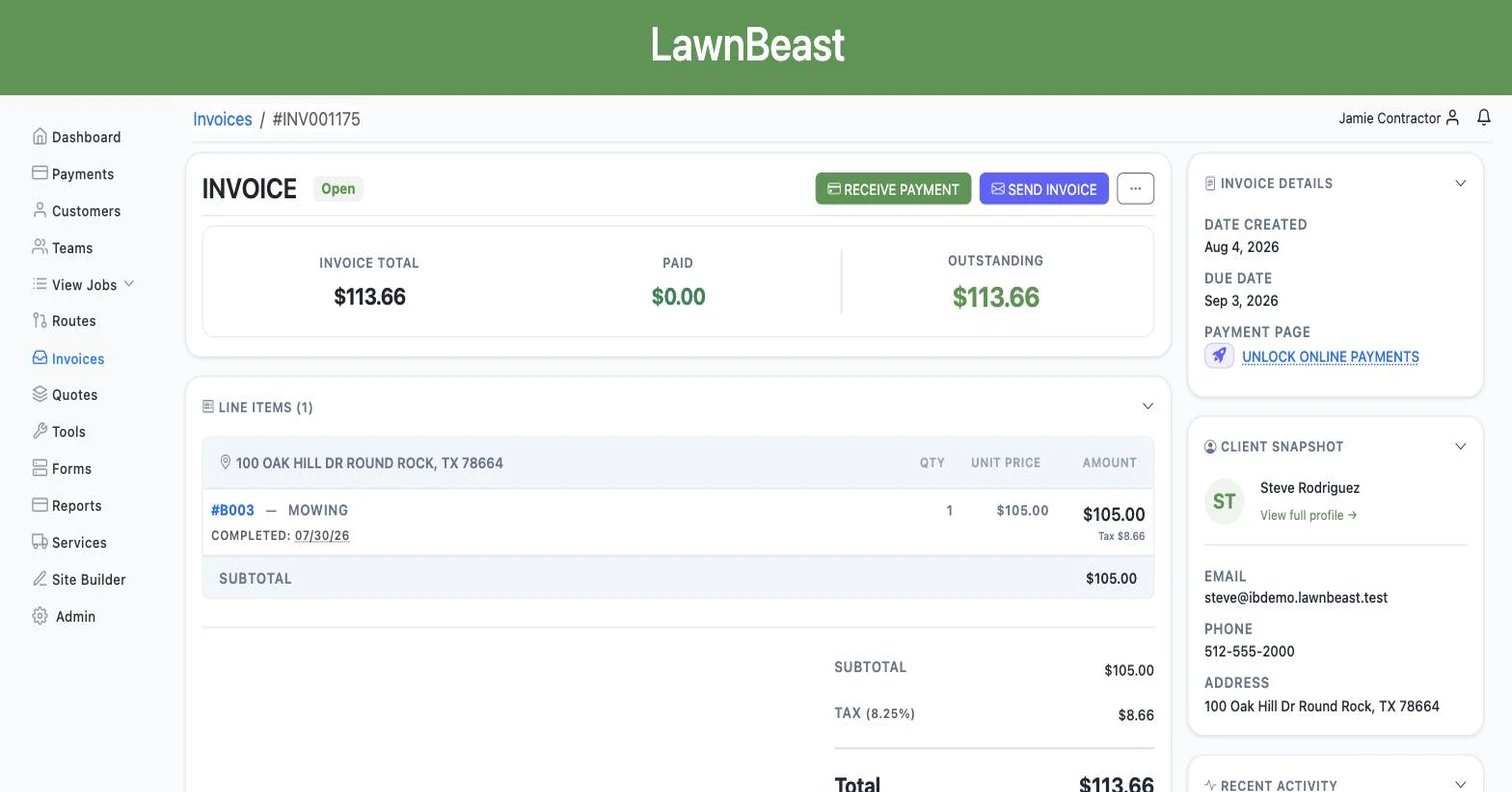
Status is Open; Send Invoice has replaced the Finalize/Edit buttons. 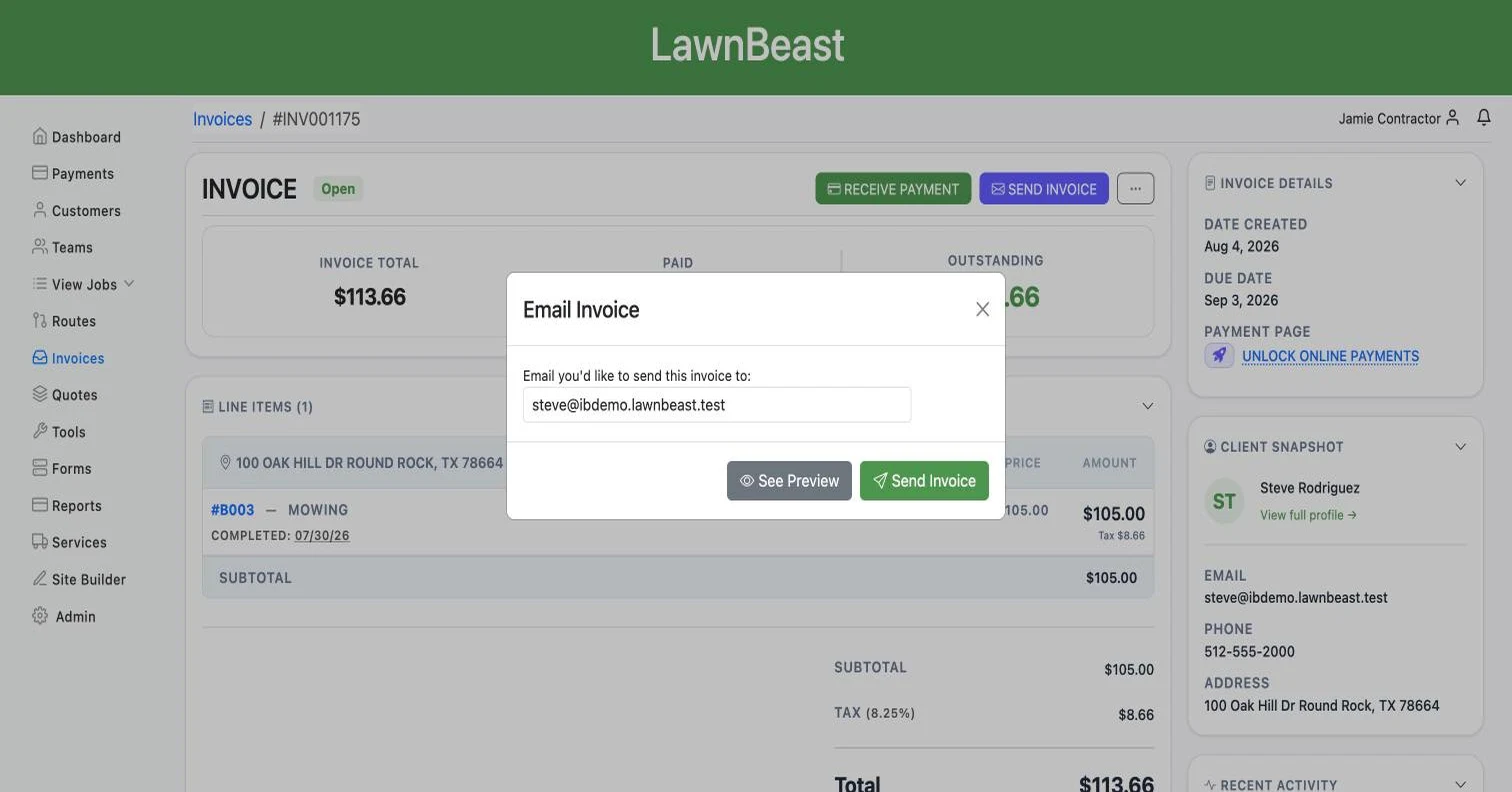
The Send Invoice modal, with the recipient pre-filled from the customer record.
The editor filters to draft invoices only. If you need to change a finalized invoice, do it through the status actions on its detail page instead of trying to reopen the builder.
How to check it worked
The invoice's status badge reads Open, and (once sent) the send button relabels to Resend Invoice. If it doesn't get paid on time, Invoice Reminders can follow up automatically instead of you tracking due dates by hand.
Reference
| Status | What it means |
|---|---|
| Draft | Editable in this builder. Not visible to the customer. |
| Open | Finalized and billable. No longer editable here. |
| Partially Paid | Some but not all of the balance has been received. |
| Paid | Full balance received. Terminal. |
| Void | Cancelled permanently. Terminal. |
| Written Off | Marked uncollectible. Can still flip to Paid on a late payment. |
Tracking these one invoice at a time doesn't scale past a handful of customers — the AR Aging Report shows every unpaid invoice across your whole book, grouped by how overdue it is.